


Sabtu, 11 Februari 2012
Caramelized Onion and Sausage Pizza on a Skillet Biscuit Crust
The boys were eating a pizza last night and I didn't want all the cheese and crust theirs had. I decided to look around the kitchen to see what I could find. Ingredients were: Tube of Big Biscuits, Alfredo Spread, Parmesan, an Onion and left over Sausage Links from breakfast. I grabbed my CIS and a yummy pizza was created. Make if for breakfast to appetizers...it's great anytime. I also made one with canned peaches, alfredo spread and parmesan...it was pretty good combination!

Read more »

Rabu, 08 Februari 2012
Homemade Mounds Candy
A very dear, sweet and beautiful friend, Sandy Lewis Howell, gave me this fantastic recipe for mounds candy. I just love it! It's really easy to make..a bit sticky but oh so good! I made a couple of changed to her recipe. Mainly, because it was what I had on hand. ~smile~ I decreased the amount of coconut to 7 oz because that was all I had. It made a thin 8x8 pan. The candy is so rich, it was just the right size for us. I also used almond bark instead of the chocolate chips. Enjoy! <3 and hUgs!


Mounds Bars
5 ounces sweetened condensed milk
1 teaspoon vanilla
2 cups powdered sugar
14 ounces flaked coconut
1 (24 ounce) bag of semisweet chips
almonds, optional to place on top before dipping in chocolate to make
almond joys

Blend the milk and the vanilla.

Add the sugar a little at a time till smooth

Stir in the coconut.

The mixture should be firm.

Line pan with plastic wrap and spray lightly with non-stick spray.
Pat firmly into a 9x13 pan and chill till firm. You can also skip this and roll into balls.
Pat firmly into a 9x13 pan and chill till firm. You can also skip this and roll into balls.

Cut into bars, or shapes and put in the refrigerator or freezer until set.

Take out of fridge or freezer and dip in melted candy.
Let cool on waxed paper for several hours or place in fridge or freezer again.


Shared on
Poster Blackboard
I have been looking for something to make a blackboard for my boys. I have been painting chalkboard paint on jars all week it seems. ~smiles~ Today, I remembered the poster board I bought for Lucas. There is a design around the edges, so he didn't want to use them. I loved them of course! <3 Anywho, here ya go. An easy project to give you, and your kids, a place to be yourselves. <3 and Hugs!
Pin It


Pin It


Poster Chalkboard
What you need..
poster board with boarder
brushes
primer
chalkboard paint
painter's tape
Tape frame around the middle of the poster board.

Paint one, or two, coats of primer. Waiting until dry between coats.

Paint a coat of chalkboard paint. Let dry and paint another coat. You may need to give an additional coat if you see any bare spots. Remove painters tape. Follow directions on chalkboard paint can to write on board. <3 and hUgs!
Senin, 06 Februari 2012
Heart Marshmallow Pops
One of the twins wanted to do something by himself. We went to the store and he picked out the heart shaped marshmallow and sprinkles. Came home and started making his treats. We'll make these for their classes on Valentine's Day. <3 and hugs!

Heart Marshmallow Pops
heart marshmallows
white chocolate chips or almond bark
sprinkles
pop sticks

I melted almond bark for this picture. (If using white chocolate chips, melt according to directions.) Dipped the pop stick the melted candy and put it in the marshmallow. He added the melted candy on with a butter knife. <3

Sprinkles came next. <3

And....more sprinkles! <3

He still needed more! <3


His twin finally got a bite! <3

Some little fingers in the background reaching for a treat. <3
Shared on
Chocolate Blog Hop
Gooseberry Valentine's Day Roundup
Weekend Potluck
EMM Church Supper
Shared on
Chocolate Blog Hop
Gooseberry Valentine's Day Roundup
Weekend Potluck
EMM Church Supper
Minggu, 05 Februari 2012
Buffalo Chicken Bites
Here you go!!! Something totally different, buffalo chicken with celery and ranch all rolled up into one amazing bite! You will definitely want to double this!
-001.JPG)
Read more »
-001.JPG)
Read more »
Sabtu, 04 Februari 2012
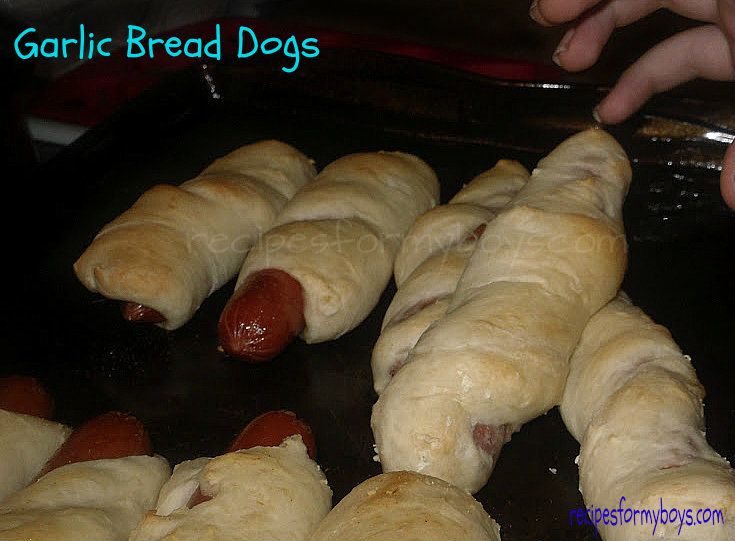
Garlic Bread Dogs
My youngest is sick. He had a fever of 102 last night, low grade today and now it is 103!! My poor baby hasn't eaten since Thursday. He really loves these hot dogs and didn't feel like eating them tonight. They are really easy to make with as little as two ingredients. <3 and hUgs!

Read more »
Jumat, 03 Februari 2012
Chalkboard Canning Jars
I am getting ready for the twins birthday and racking my brain trying to find something for the kids as a gift. I decided, I would make them personalized glasses out of canning jars.
Pin It

To make them personal, I bought chalkboard paint and painted the label part of the jar. For this you'll need....
Chalkboard Paint, I bought mine at walmart for $9.99. I went to Lowe's and their's was twice as much. I wanted to make my own, so I could make something other than black. My hubby, Ted, talked me into buying it already made. I'm so glad he did!
Primer, You need to do this before putting the blackboard paint on.
Painters Tape, optional. I used it on some and found it was easier to just paint freehand. If it's out of the lines a little, it doesn't matter. It just shows it's homemade! <3
Paint brushes, I used a 1 and 1 1/2" brushes.
Lids, that go on fast food drink cups. Ask next time you are there, chances are they'll give you some. ~smile~
Chalk, to write names on glasses
Straws, to give with the glasses. Plain or fancy ones.
Ribbon, to tie the straw to the glass.
Clear coat, to paint over the chalkboard, if desired.
Now, get everything set up on your table, turn on some music, put your newsfeed up on facebook and paint your day away! Very simple to do!
Start with the primer. Let it dry. Paint a second coat.
Paint chalkboard paint once the primer is dry. Repeat once or twice more. I painted three times.
Paint clear coat on if desired.
There you go!
Pin It


Pin It
 Pin It
Pin It


Shared on
Show and Tell Saturday
Saturday Spotlight #75
Pin It


To make them personal, I bought chalkboard paint and painted the label part of the jar. For this you'll need....
Chalkboard Paint, I bought mine at walmart for $9.99. I went to Lowe's and their's was twice as much. I wanted to make my own, so I could make something other than black. My hubby, Ted, talked me into buying it already made. I'm so glad he did!
Primer, You need to do this before putting the blackboard paint on.
Painters Tape, optional. I used it on some and found it was easier to just paint freehand. If it's out of the lines a little, it doesn't matter. It just shows it's homemade! <3
Paint brushes, I used a 1 and 1 1/2" brushes.
Lids, that go on fast food drink cups. Ask next time you are there, chances are they'll give you some. ~smile~
Chalk, to write names on glasses
Straws, to give with the glasses. Plain or fancy ones.
Ribbon, to tie the straw to the glass.
Clear coat, to paint over the chalkboard, if desired.
Now, get everything set up on your table, turn on some music, put your newsfeed up on facebook and paint your day away! Very simple to do!
Start with the primer. Let it dry. Paint a second coat.
Paint chalkboard paint once the primer is dry. Repeat once or twice more. I painted three times.
Paint clear coat on if desired.
There you go!
Pin It


Parmesan lid from a plastic container transforms your jar into a shaker! Perfect place to keep you already grated parmesan!


Pin It


Pin It


Shared on
Show and Tell Saturday
Saturday Spotlight #75
Langganan:
Postingan (Atom)